
It was time for a new computer. I thought about a laptop, but I already have a Netbook and iPad, so any portability concerns were covered. Also, the storage capacity of laptops are generally limited to a single 2.5 inch hard drive, and the potential for future upgrades of other hardware is limited. I looked at Dell desktops again, but they don't seem to allow as much customisation as they did 9 years ago. Dell also seemed pretty pricey for what you get.
Looking at various hardware vendors, I realised I could build a PC exactly the way I wanted much cheaper than the major brands, and still allow room for future upgrades so that this computer will last many, many years.
I hadn't assembled a computer from scratch before,
but having performed numerous upgrades and repairs to friends and families computers over the years
(as well as my old Dell), I was confident in the build.
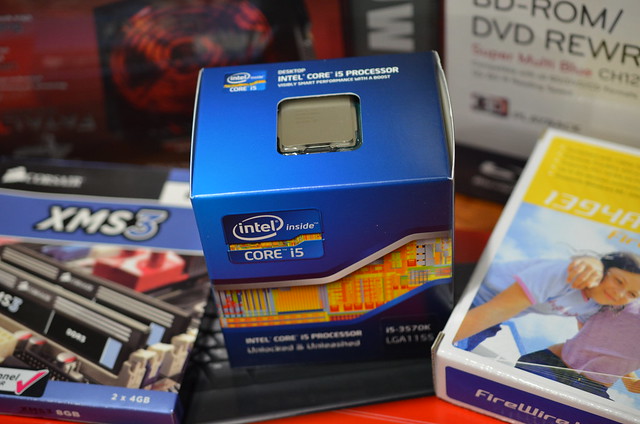
The heart of my system is the Intel Core i5-3570K,
it is unlocked if I decide to go down the over-clocking road and incorporates the best Intel graphics.
I'm not a big "gamer" so I'm hopeful that I wont need a dedicated graphics card,
but if I do the motherboard has the slots needed.
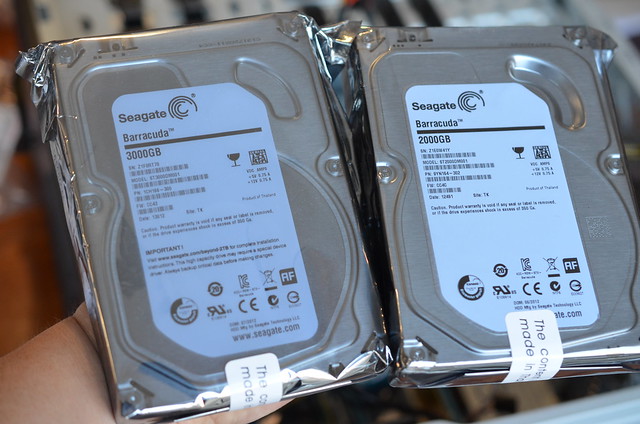
I've purchased two Seagate hard-drives for the new system to give me a total of 5TB of storage.
The 2TB drive is partitioned to keep the Operating System separate from everything else,
this will allow for easy re-installation when needed.
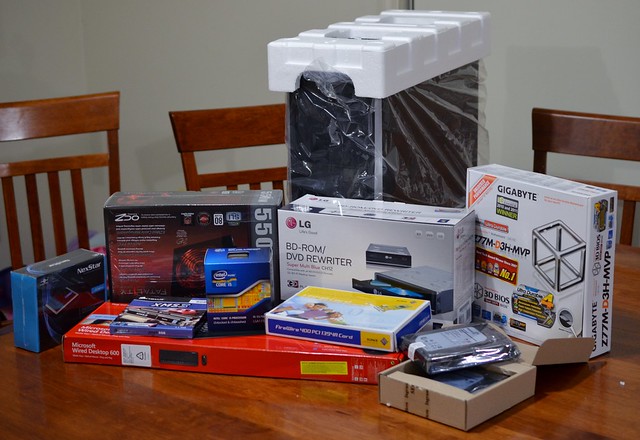
Building my "Homebrew" computer.
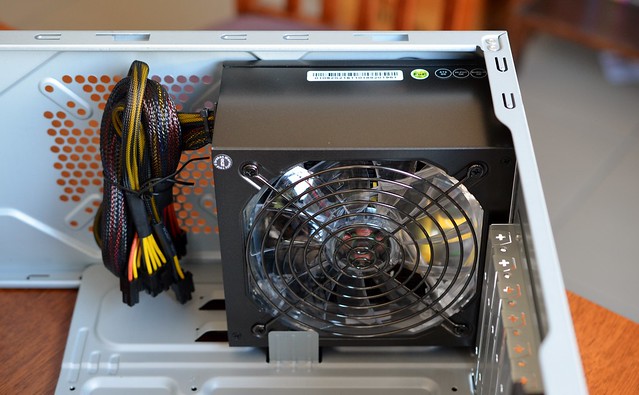
First-up in the build was installing the power supply into the case.
I chose a modular PSU to minimise the amount of unused cables in the case.
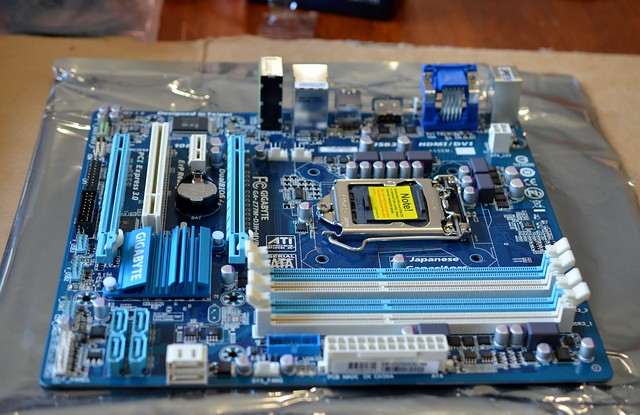
Next, it was time to fit out the motherboard...
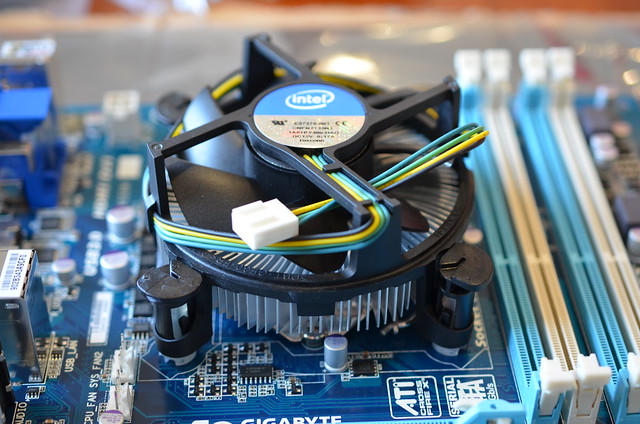
...with CPU, cooler...
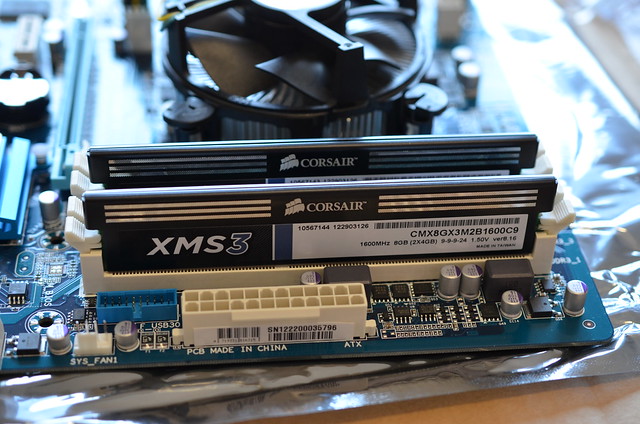
...and RAM memory.

With the basics now fitted to the motherboard, it can then be screwed into the case...

...and it's time to start plugging in.
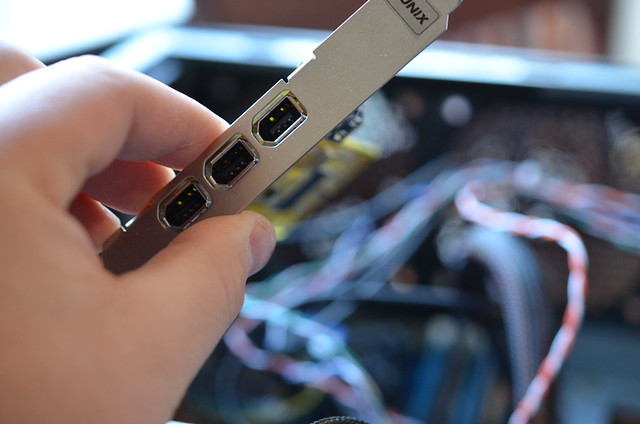
With a computer that can now competently handle video,
I've installed a Firewire card so I can download home videos.

Almost finished, install the drives...
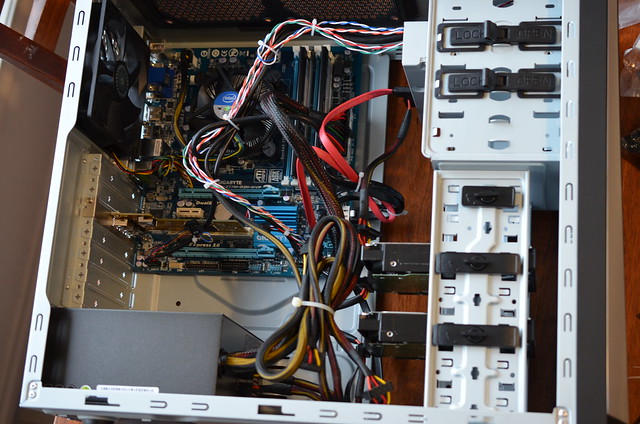
...and tidy up the leads with cable-ties.
Time to fire-up the new machine and install an Operating System.

With the public release of Windows 8 only a month or so away,
I didn't want to buy an obsolete O.S, so I've installed the "Release Preview" for now.
Finally I need to get all of my old data onto the new machine.
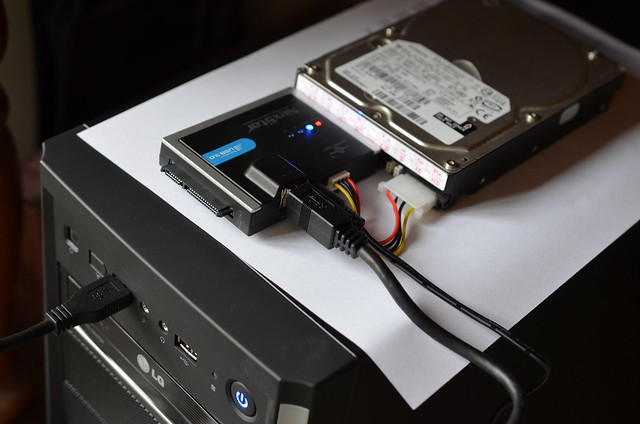
With the HDDs removed from the old Dell machine,
my "NexStar" adaptor can connect to both SATA and older IDE drives,
sending data to the new PC via USB3.